Skip Navigation: Avoid going through Home page links and jump straight to content
NASA Logo - Jet Propulsion Laboratory    + View the NASA Portal
Search Stardust  
JPL Home Earth Solar System Stars & Galaxies Technology
Stardust Banner
Overview Mission Science Technology Newsroom Education Gallery Links Stardust Home
 
Science Photos
Landing Photos
People Photos
Multimedia
Cleanroom Photos
Comet Wild 2 Photos
Aerogel Photos
Asteroid Annefrank Photos
Launch Images
Spacecraft Images
Miscellenous Photos
Outreach
Artist Renderings


gal_msn_photos.gif
 
1097899fig1_s.jpg
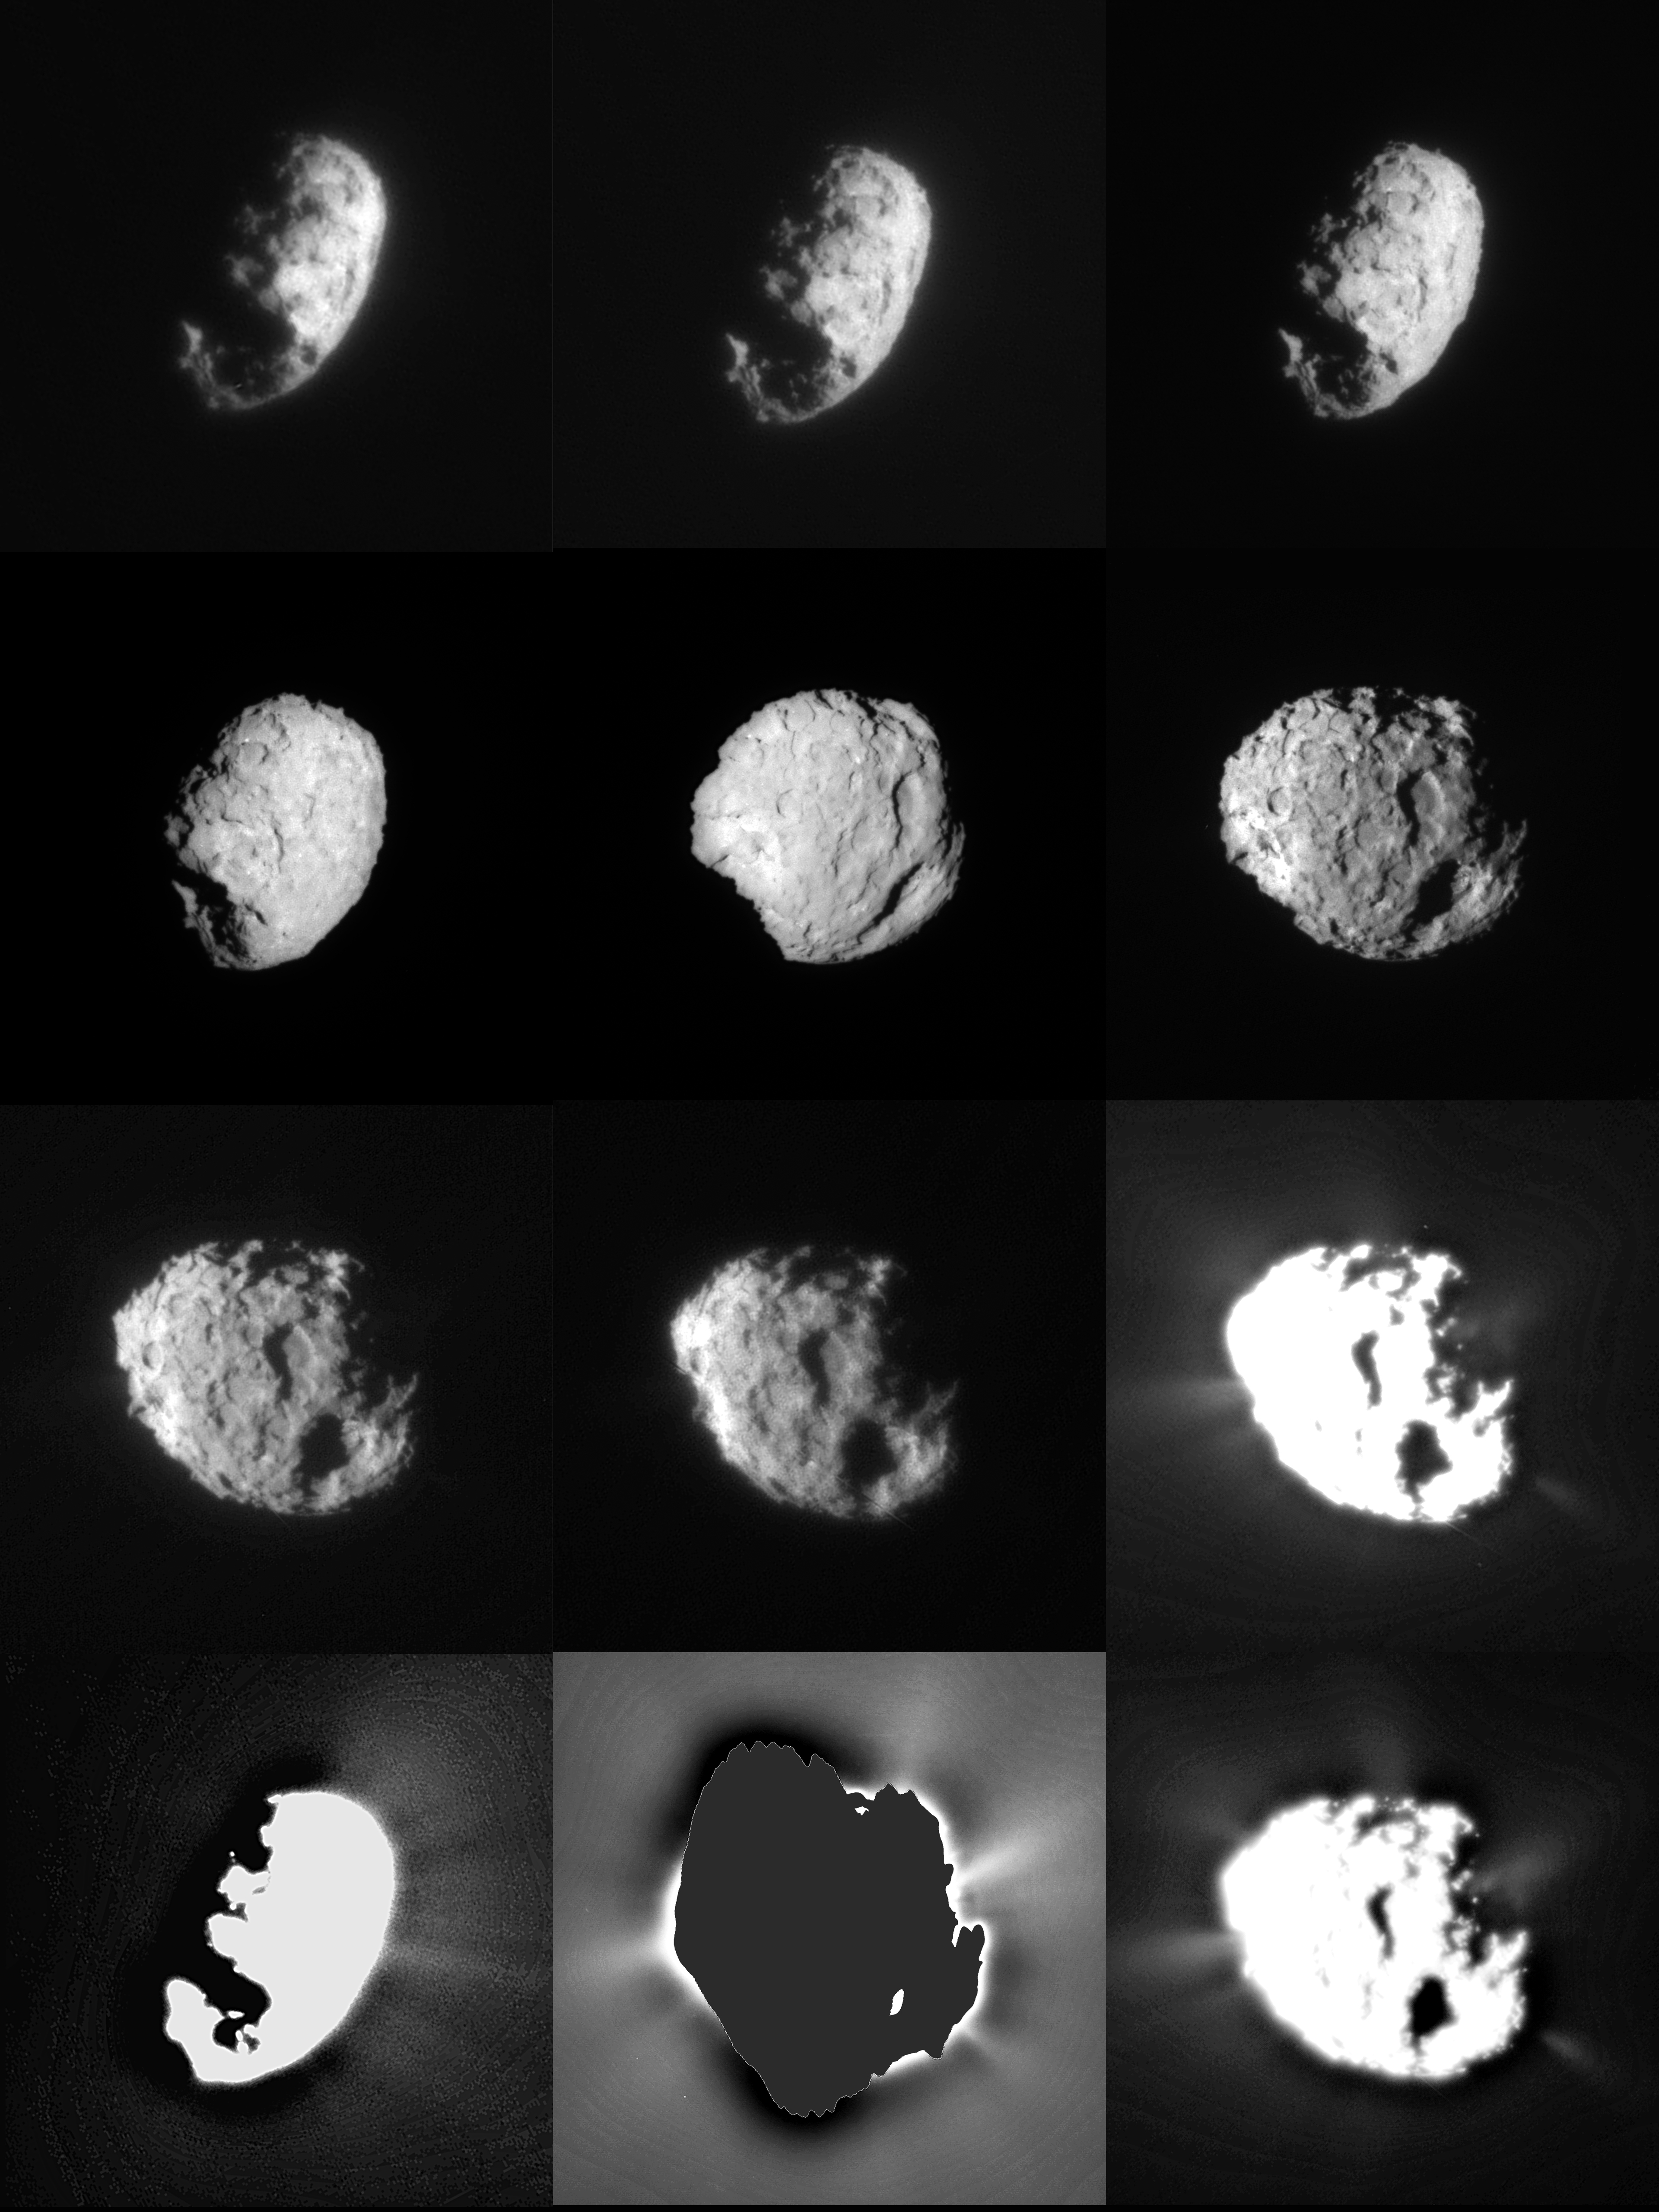
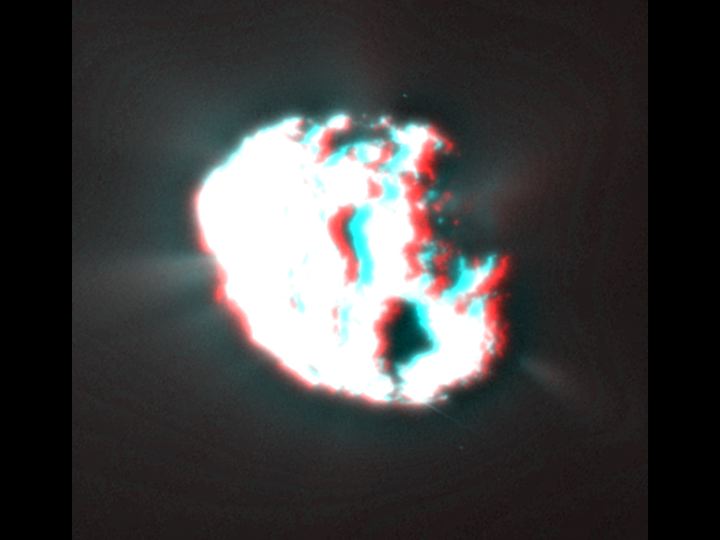
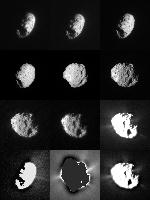
Figure 1: A Dozen Views of Wild 2
JPEG Image (4.6 MB)

These 12 images are a good representation of the closest images of comet Wild 2. The temporal sequence starts at the upper left and continues left to right on the first three rows. The overexposed and out-of-sequence images at the bottom are long exposures t aken for autonomous tracking and yield the best jet images. All images were scaled to a constant image scale.

1097899fig2_s.jpg
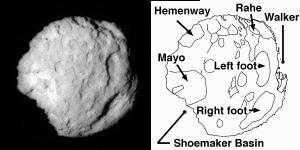
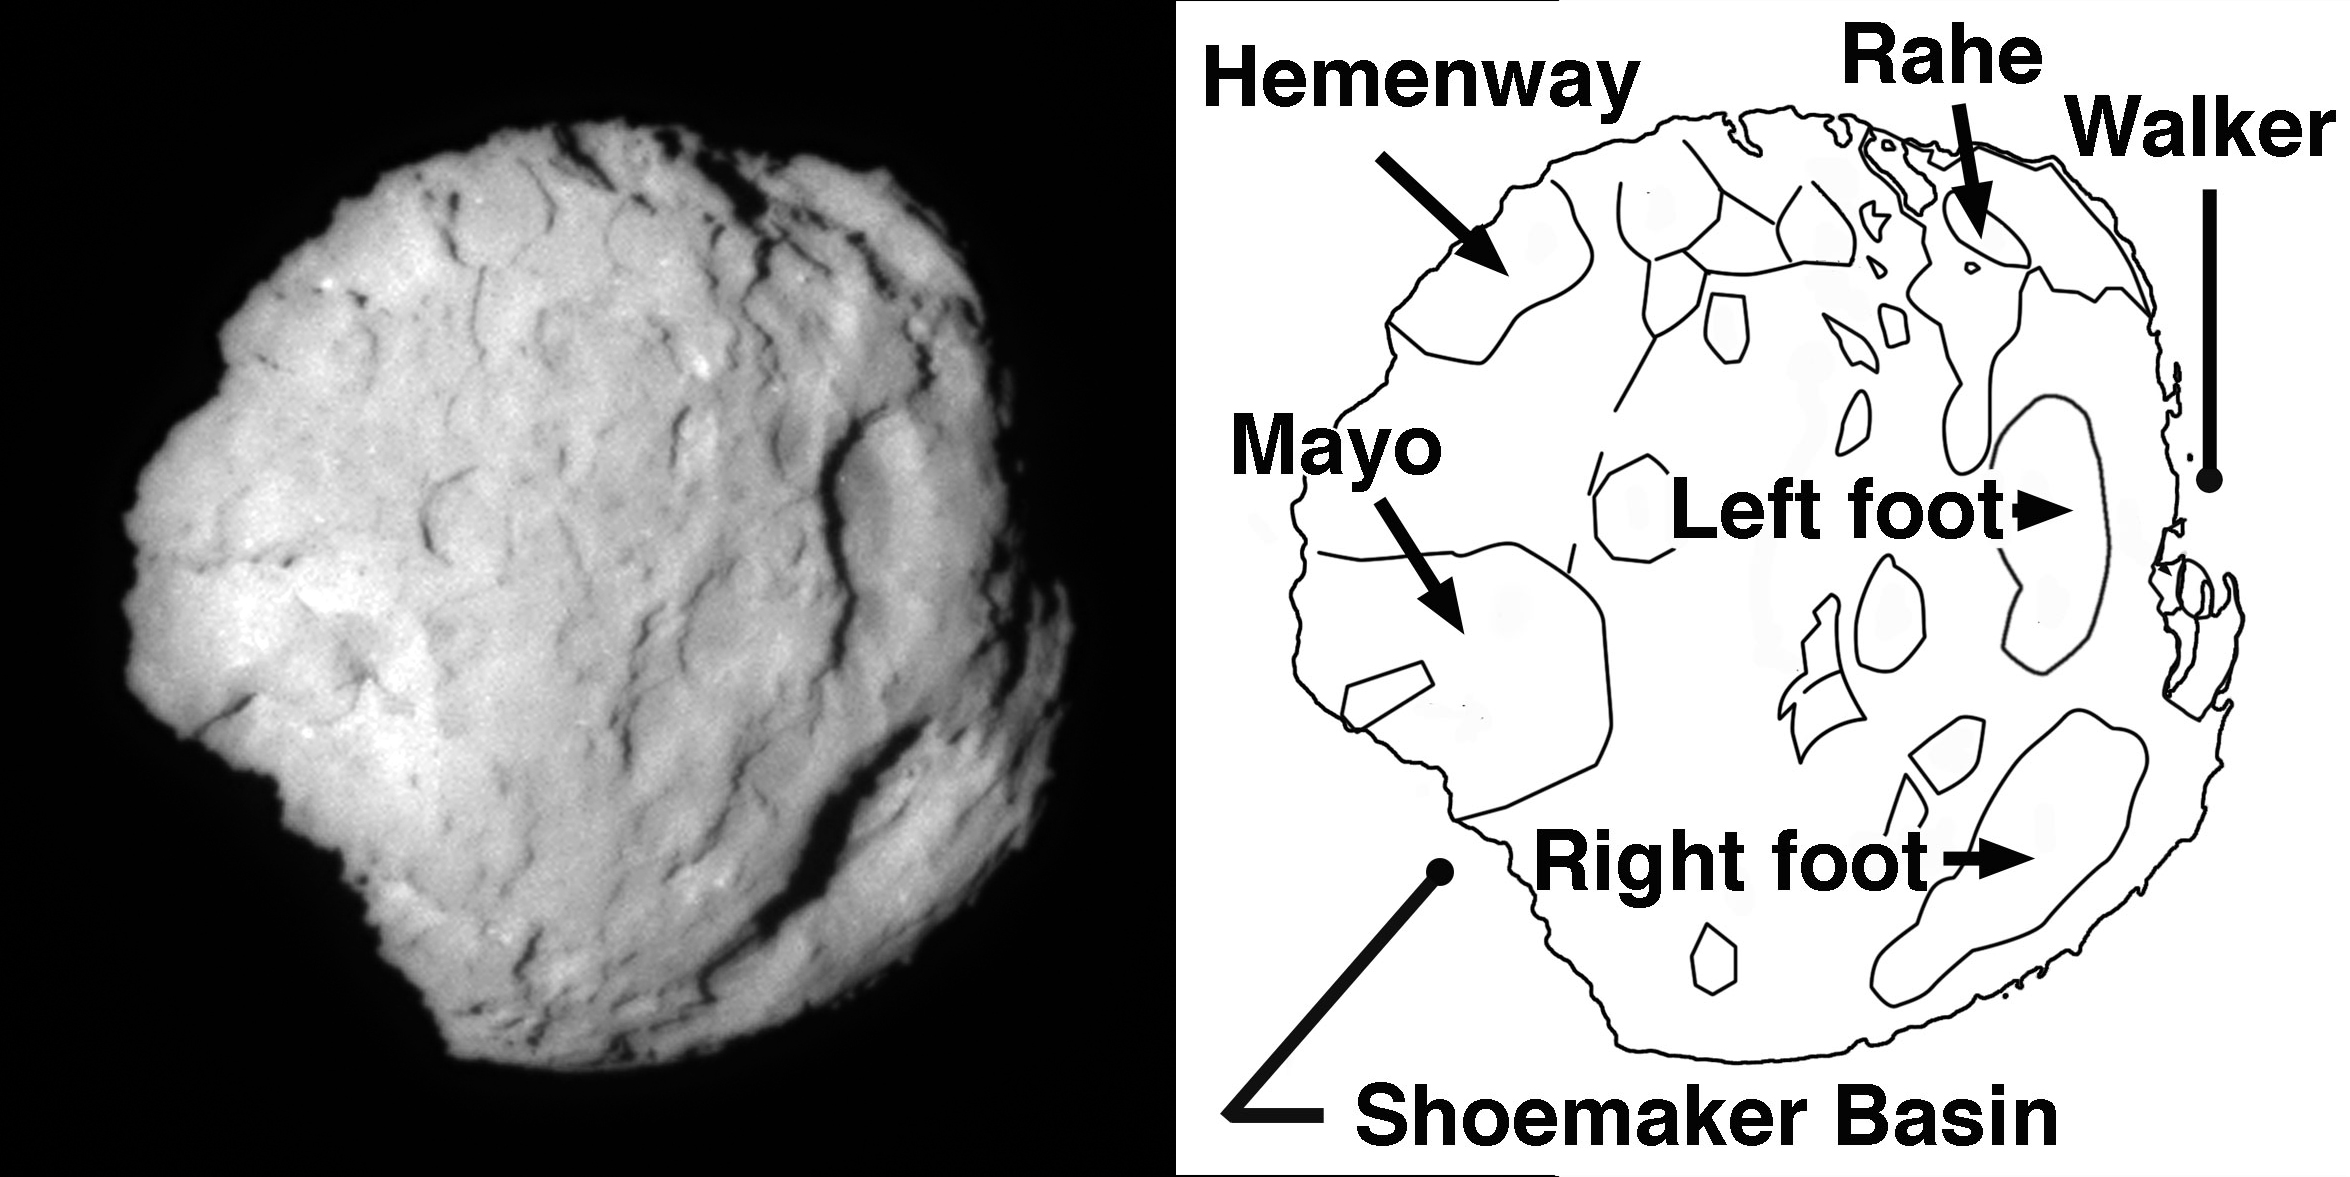
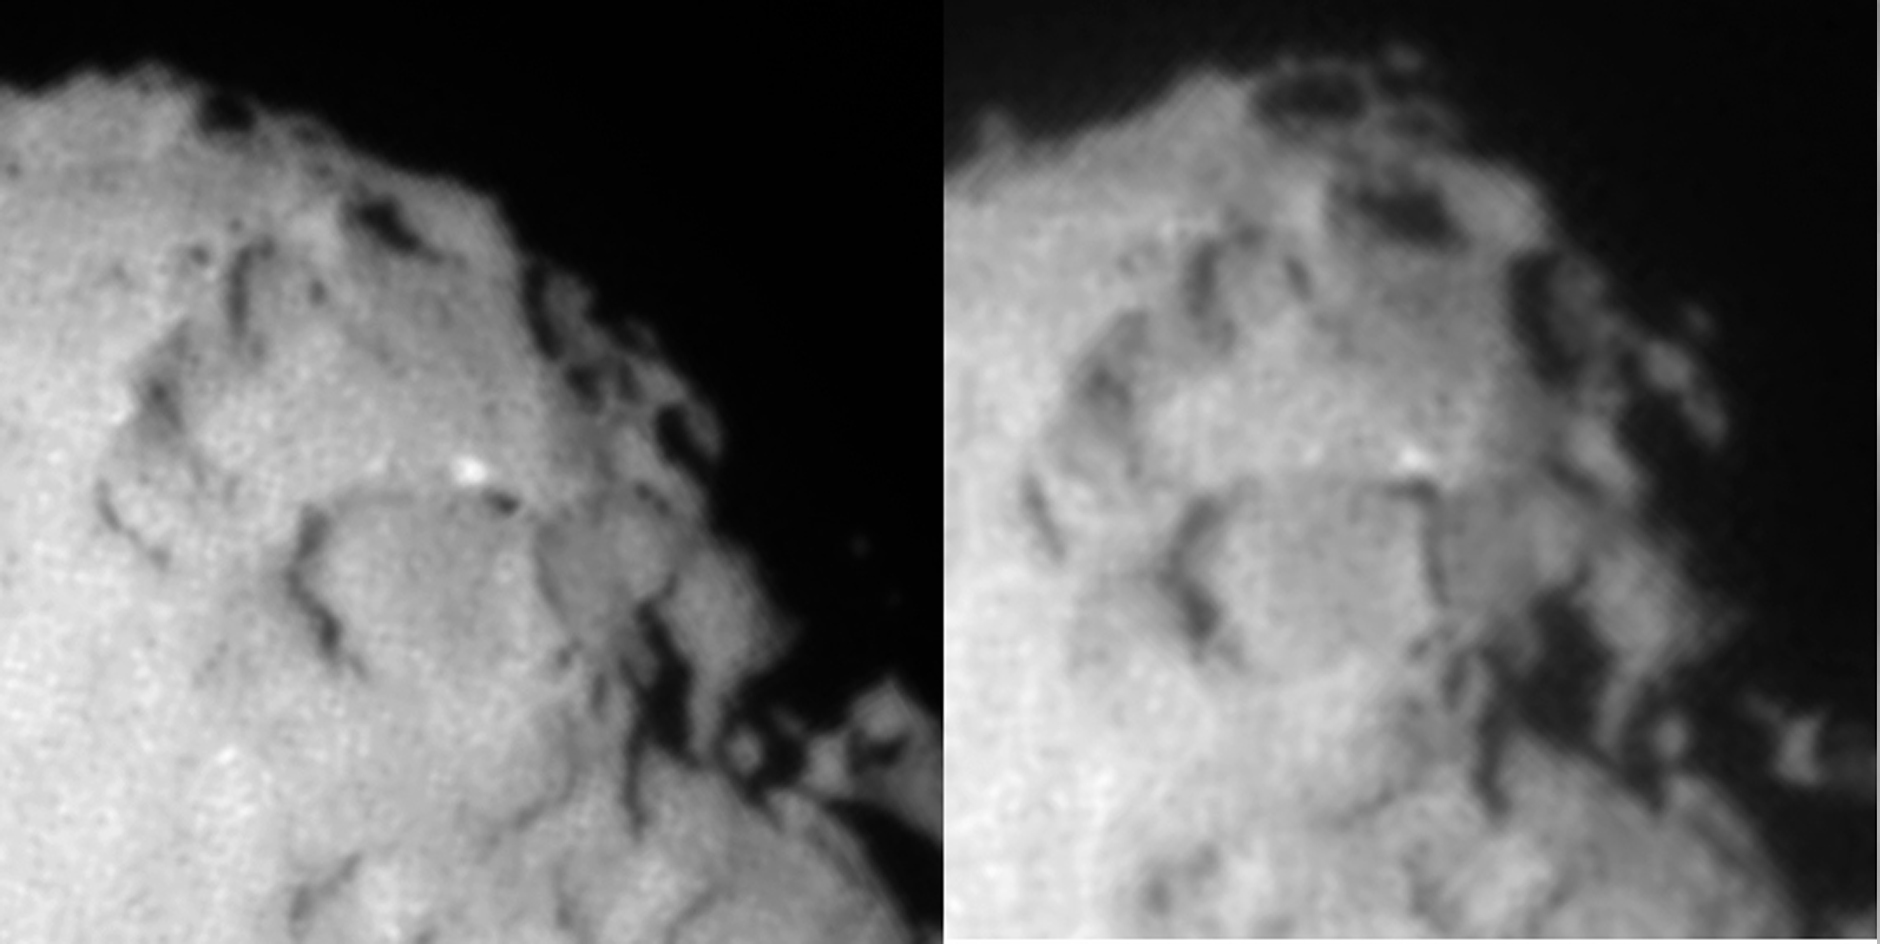
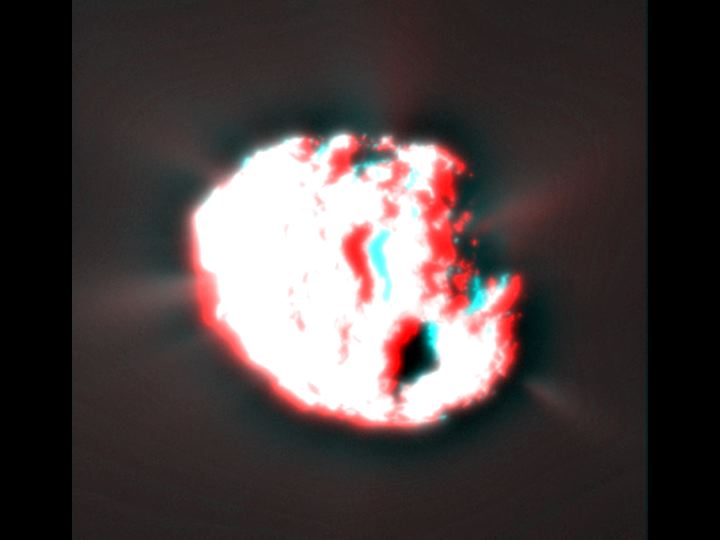
Figure 2: Wild 2 Mosaic
JPEG Image (458K)

This image and diagram show the comet Wild 2, which NASA's Stardust spacecraf t flew by on Jan. 2, 2004. The picture on the left is the closest short exposure of the comet, taken at an11.4-degree phase angle, the angle between the camera, comet and the Sun. The listed names on the right are those used by the Stardust team to identify features. "Basin" does not imply an impact origin.


1097899fig3_s.jpg
Figure 3: Wild 2 - Three Stereo Views
JPEG Image (2.0 MB)

The top and bottom images are three stereo pairs taken just after and just before closest approach to comet Wild 2. The central image is an enlargement highlighting the pit-halo crater Rahe, just to the right of center. The bottom pair shows Hemenway (with its bright spot), Mayo and Shoemaker, all near the terminator. A large pinnacle can be seen in the center of Shoemaker with its shadow cast on the west wall of the basin. A mesa is also seen on the west limb of Shoemaker. The central region of the terminator illustrates the remarkably rugged nature of the surface of Wild 2.

1097899fig4_s.jpg
Figure 4: Lunar Glass Microcrater
JPEG Image (460K)

A 10 micron-diameter microcrater on lunar glass shows a smooth central pit surrounded by a zone of ejected material. Although much smaller, this crater form, common for centimeter and smaller craters on the Moon, is an intriguing analog to pit-halo craters such as Rahe seen on comet Wild 2. The pit-halo depressions on Wild 2 formed in a rigid material under microgravity conditions.

1097899fig5_s.jpg
Figure 5: Wild 2 Crater Analog In Lab
JPEG Image (339K)

A 10 centimeter-size (3.9 inch) laboratory hypervelocity impact crater was made as an analog of comet Wild 2's flat-floor craters. The crater was made with a 3.2 millimeter (0.13 inch) ceramic projectile impacting a porous target.


1097899fig6_s.jpg
Figure 6: Wild 2 Features
JPEG Image (240K)

These images taken by NASA's Stardust spacecraft highlight the diverse features that make up the surface of comet Wild 2. Side A shows a variety of small pinnacles and mesas seen on the limb of the comet. Side B shows the location of a 2-kilometer (1.2-mile) series of aligned scarps, or cliffs, that are best seen in the stereo images.

1097899fig8_s.jpg
Figure 8: Wild 2 Stereo Anaglyph
JPEG Image (938K)

A stereo anaglyph (magenta on right) of comet Wild 2 shows the comet and jets seen as sunlight reflected from outward-flowing dust and rocks. Unusual jets from the shadowed side can be seen coming from Walker, on the right side of the nucleus, and from a region below Walker.


1097899fig7_s.jpg
Figure 7: Spots on Wild 2
JPEG Image (336K)

A stereo view of the bright spot in the central region of Hemenway, a feature on comet Wild 2. A smaller spot, barely detected in both images, is seen just to the left of the central spot. The stereo image also shows several remarkable upturned ridges.

2076jetisophote2_s.jpg
Jets and Brightness - Wild 2
JPEG Image (1.6 MB)

This image shows lines of constant brightness in the coma of dust and gas around comet Wild 2. The bumps mark the positions of jets.


pinnacles_s.jpg
Wild 2 Pinnacles
JPEG Image (29K)

Comet Wild 2 has many strange pinnacles, some over 100 meters (.06 miles) high. Pinnacles are found on Earth but have not previously been seen on other solar system bodies.

monvalley_s.jpg
Wild 2 Depression
JPEG Image (30K)

This stereo anaglyph shows a large depression on comet Wild 2, with a Sun-illuminated pinnacle in its center and a large mesa on its western edge. Note the pinnacle's shadow on the west wall of the depression.


wild2_phoebe_s.jpg
Wild 2, Phoebe Comparison
JPEG Image (204K)

Comparison of surface features of comet Wild 2 with Phoebe, a captured satellite of Saturn. Both of these objects are suspected to originate from the Kuiper belt.


wild2_asteroids_s.jpg
Wild 2, Asteroid Comparison
JPEG Image (30K)

This image shows comet Wild 2 and asteroids shown at the same spatial scale. Most of the depressions on asteroids and moons are classic bowl-shaped impact craters.

lunarmicrocrater_s.jpg
Lunar Glass Microcrater with Pit
JPEG Image (34K)

This image shows a 10-micron diameter microcrater on lunar glass. With its rounded central pit surrounded by a zone of ejected material, it is a close analog to comet Wild 2's halo craters.


jets1_s.jpg
Wild 2 Anaglyph with Jets
JPEG Image (26K)

An anaglyph (red-blue) stereo image showing jets. The two jets on the right are remarkable in that they come from sources on the comet's dark side.

jets2_s.jpg
Wild 2 Anaglyph with Dark Side
JPEG Image (23K)

This anaglyph (red-blue) stereo image showing jets on comet Wild 2. The two jets on the right are remarkable in that they come from sources on the comet's dark side.


PIA06283_s.jpg
Artist Conception of Wild 2
JPEG Image (525K)

This is an artist's concept depicting a view of comet Wild 2 as seen from NASA's Stardust spacecraft during its flyby of the comet on Jan. 2, 2004.

See Also Stereo Images and Stardust Animations


Last updated June 17, 2004


Privacy F.A.Q. Contact Sitemap Credit
 
FIRST GOV + Freedom of Information Act
+ The President's Management Agenda
+ FY 2002 Agency Performance and accountability report
+ NASA Privacy Statement, Disclaimer, and Accessiblity Certification
+ Freedom to Manage
NASA Home Page Site Manager:
Aimee Whalen

Webmaster:
Ron Baalke

http://www.jpl.nasa.gov http://www.nasa.gov http://www.caltech.edu/