 |
*
4. BUILD AND INSTALL THE SAMPLE RETURN CAPSULE.
View the whole assembled model
See illustration of the completed Sample Return Capsule Installation at the bottom of this page
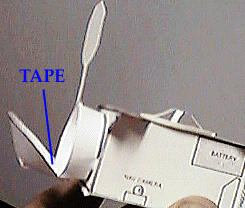
- Cut out the SRC BODY from Parts Sheet 3. Apply glue between the radial black line and the edge, where it says GLUE. Then overlap the other end of the piece over, onto the glue. It forms a section of a cone. Place edgewise on a flat surface to make sure the seam is straight before squeezing and holding till glue dries.
- Dip the smaller end of the SRC BODY in glue to wet the edge. Set it onto the circle marked SRC on the spacecraft bus (- X PANEL). Center it and let the glue dry.
- Cut out the SRC HEAT SHIELD from Parts Sheet 3. Be sure to cut out the wedge. Apply glue between the radial black line and the edge of the wedge, then overlap the other side of the wedge over, onto the glue. The circle becomes a cone. Press the seam together until the glue dries. Then crush the tip of the cone a bit by mashing it against a flat surface with your thumb.
Now you have a choice of ways to complete your model...
If you wish to assemble your model with the SRC closed as if ready to return to Earth, then just glue the SRC Heat Shield onto the SRC BODY, with its cone pointing outward. You're finished with this page; click on to the LET'S FINISH link below.
If you wish to assemble your model showing the Aerogel Collector Grid deployed and exposed to collect cometary or interstellar material, then complete the following steps...
Last Updated: November 26, 2003
|