| |||
|
|
|||
 | |||

* 5. INSTALL THE SOLAR PANELS.
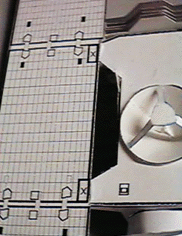
View the whole assembled model- Looking down on the Spacecraft Bus, you'll notice four "shoulders" in the + Z PANEL, outward from where the HGA is mounted. Apply some glue to the tips of those shoulders.
- Locate the two squares marked X on a solar panel. Turn the panel, with printing up, so its Whipple shield is pointing in the same direction as the Main Whipple shield on the bus. Press the solar panel down onto the bus's "shoulders" just below the X. See the image. Squeeze the X onto the shoulder tip with long nose pliers in two places. Make sure the Solar Panel is aligned parallel to the bus, and level with the + Z PANEL.
- Repeat with the other solar panel.
This completes the Solar panel installation!
| INSTRUCTIONS FIRST PAGE |


| Webmaster: Ron Baalke |
