| |||
|
|
|||
 | |||

* 3. BUILD AND INSTALL THE HIGH-GAIN ANTENNA.
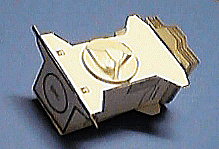
View the whole assembled modelSee illustration of the completed High Gain Antenna Installation at the bottom of this page
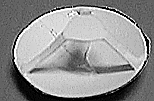
- Cut out the HIGH GAIN ANTENNA DISH (HGA) from Parts Sheet 3. Be sure to cut out the wedge. Apply glue between the radial black line and the edge of the wedge, then overlap the other side of the wedge over, onto the glue. The circle becomes a cone. Press the seam together until the glue dries. Then crush the tip of the cone a bit by mashing it against a flat surface with your thumb.

- Cut out the TRIPOD from Parts Sheet 3. Crease each of its three legs down where they join the central circle. Apply glue to the ends of the legs, and stand it inside the HGA, with the legs very near the edge of the dish. Let the glue dry.
- Glue the completed HGA into the circular opening atop the Spacecraft Bus assembly, rotated so that one of its tripod legs points directly forward toward the main Whipple shield.
This completes the HGA installation!

| GO ON TO THE NEXT STEP |
| INSTRUCTIONS FIRST PAGE |


| Webmaster: Ron Baalke |
